Sunday, April 29, 2012

International Antiques Fair 2012

Oh Hello,

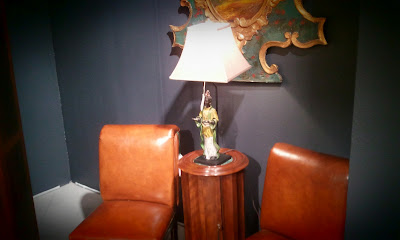
Being so old never looked so good!  I went to the 2012 International Antiques Fair at the Merchandise Mart http://www.merchandisemartantiques.com/spring/ in Chicago. It was amazing to see hundreds of booths full of antiques and vintage items from BC to the early 20th Century.  The merchandise spanned literately from around the globe...Europe, Africa, Asia, the Americas, etc.

There were a few featured designers that I found to be amazing.  Ramsey J Prince and Summer Thornton.  Their compositions were inspiring and beautiful! Amazing how one can use "old stuff" to make such striking rooms!

Please enjoy few of the pictures I took as I wondered around this years Antique Fair.


RJP Designs http://ramseyjayprincedesigns.com/

RJP Designs http://ramseyjayprincedesigns.com/

Summer Thornton Design www.summerthorntondesign.com

Summer Thornton Design www.summerthorntondesign.com

Brenner|Valdez |Antiques| Interiors
 
Toulouse Antique Gallery, Inc
Good Day
--D. Charles

Saturday, April 28, 2012

FORM...Art and Floral...What a Show!

Oh Hello!

When my good friend Angela Bryant from Abryant Gallery asked me to attend Form: Art + Floral, I was intrigued.  I love art and I love flowers...so what better show to go to? The show at the Loft on Lake was a juried group-exhibition made up of ten artists and five florists sponsored by Natural Beauties Floral, Reenie Rose Abryant Gallery and Kristine Aletha Weddings.

Form was exactly what the title says "Art + Floral."  An artist submitted an original work and then a florist interpreted that piece into a floral arrangement.
The artwork and accompanying floral arrangement are on exhibit to show the dialogue that happens through the art of interpretation.
The artists and florists at this show were amazing!  Their creations and interpretations were awe inspiring. To see the original piece of art an then how the florist saw it through the creative eye of floral arrangement was fascinating.

I've included a few pictures of the event.  I also listed the artists and their contact information, please have a look at their websites...you''ll be inspired.


Angela Bryant-www.abryantgallery.com
Robert Burnier-www.world3ideas.com
Tom Burtonwood-www.tomburtonwood.com
Young Cho-www.young-cho.com
Helen Maurene Cooper-www.hmcooper.com
Robin Dluzen-www.robindluzen.com
Loreen Hospodar-www.reeierose.com
Sam Jaffe-www.samjaffe.org
Mike Nudelman-www.mikenudelman.com
Morgan Sims-www.morgan-sims.com

Natural Beauties Floral-www.naturalbeautiesfloral.com/
Reenie Rose-www.reenierose.com/
Abryant Gallery-www.abryantgallery.com
Kristine Aletha Weddings-www.kristinealethaweddings.com

Good Day!
--D. Charles

Sunday, April 22, 2012

DIY...Denim Fabric Wall Covering

Oh Hello!

They say anything goes with denim.  Well what about having denim on your wall?!  I have a great sun-room in my apartment with windows on two of the walls.  The facing wall though is a bit drab.  So I decided it needed a little pizzazz.  I have applied fabric to walls in other areas of the apartment so I thought it would be great in my sun-room as well.

The reason I love applying fabric to walls because you can change it if you don't like it; you can wash it if it gets dirty; it adds texture to the wall and you have endless options!

I found a nice dark denim material at a local fabric store.  By the advice of the sales person I washed the denim to ensure it wouldn't stain the wall.  After washing the material it was time to get started!

Supplies List:
  • Plastic Bucket
  • Liquid Starch
  • Brushes
  • Squeegee 
  • Water
  • Exacto Knife
  • Push Pins
  1. First Clean the Wall. 
  2. Hold the fabric up to ensure it will fit the area you are trying to cover. Also measure the wall and allow about 2 inches of extra material beyond the area you are covering.  My material isn't as wide as my wall, which I like.  The color of the wall will actually frame the material, plus since it is denim is a bit frade on the edge I thought if would add a neat dynamic to the wall.  
  3. Begin brushing on the starch to the wall (I sometime add a little water). Quickly apply the fabric to the "starched" wall.  Use the push pins to hold the fabric in place.  I try to do small sections horizontal and working my way down the wall.
  4. Use the squeegee to smooth the fabric and push out the air bubbles, however I found that using my hands worked better for this project.
  5. Apply another application of starch on top of the fabric.  
  6. Once you get the starch on the wall/fabric allow it dry and trim the excess.
Viola!  You have a beautiful new wall with color and texture.

Before

After
After...I decided to add my wing back chair (I'm actually composing this blog from that chair!)
Adding the chair makes a perfect reading spot for the sun-room.


Good Day!
--D. Charles